
Customer Support
SSL confirmation via HTTP(S) method
More specifically, you will need to add a .txt file with specific content to a certain path of the home folder from which your site is running. This will allow the issuing authority to authenticate the domain and proceed with the certificate issuance process.
Instructions:
1. You will need to send a request to support, stating that you wish to change the way SSL is confirmed to be done via HTTP(S) validation method. For security reasons you can send the request:
a. Either by sending an email from the SSL administrator's email to support@top.host
b. Either by creating a new request from the myTophost Panel >> Support >> Send New
2. After the technical department receives your request and takes the necessary actions to change the existing validation method to HTTP(S), they will respond to your request by sending you instructions for the file you will need to create in a specific path.
3. An example with instructions for SSL authentication via the HTTP(S) method is as follows:
| FILE:
yourdomain.com/.well-known/pki-validation/C0A95AC8833510FB60C55CE58671604F.txt
FILE CONTENT: e13e5e800f54ea95452e8f5b5538d4f455888d2fccc9d04a730507e2bf454ac6 comodoca.com PPTt8ckyb5YB7JhdDRsh |
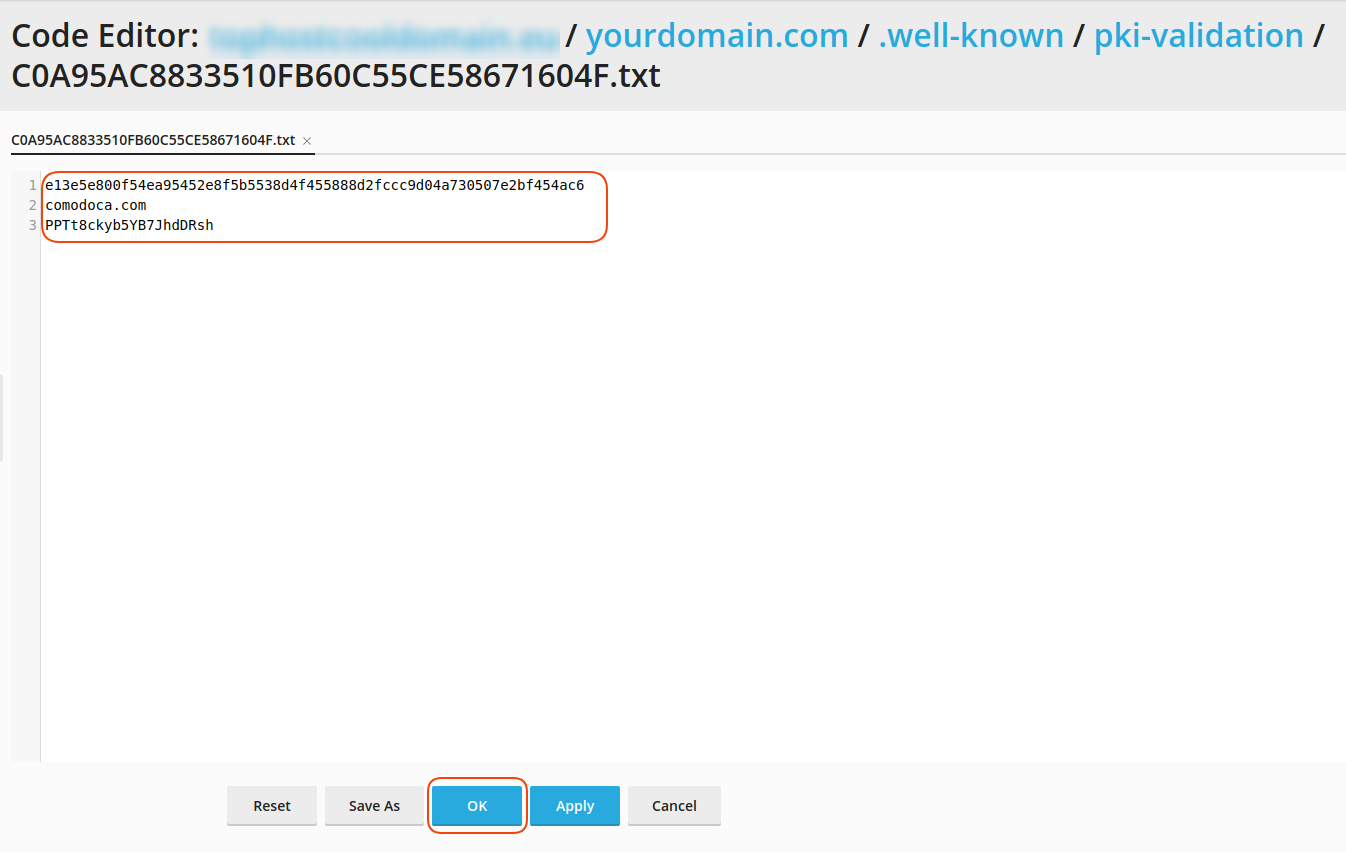
Therefore, based on the above instructions you will need to create a "C0A95AC8833510FB60C55CE58671604F.txt" file which will exist within the path: "yourdomain.com/.well-known/pki-validation" and opening the file should have the contents:
e13e5e800f54ea95452e8f5b5538d4f455888d2fccc9d04a730507e2bf454ac6
comodoca.com
PPTt8ckyb5YB7JhdDRsh
So let's see how to create it step by step.
Let's say our site name is yourdomain.com and it looks in the folder httpdocs/
3.1 After logging into your Plesk via the myTophost Panel, select Plesk Login.

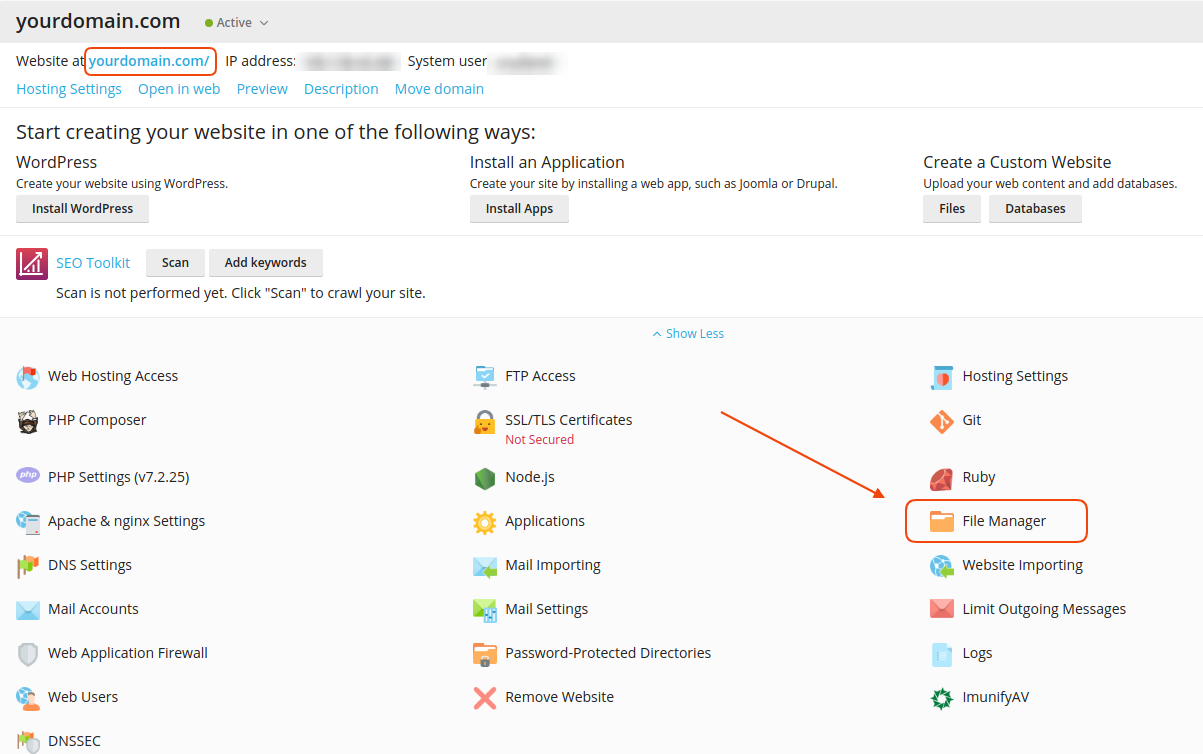
3.2 Click on the Websites & Domains tab, select the File Manager icon.
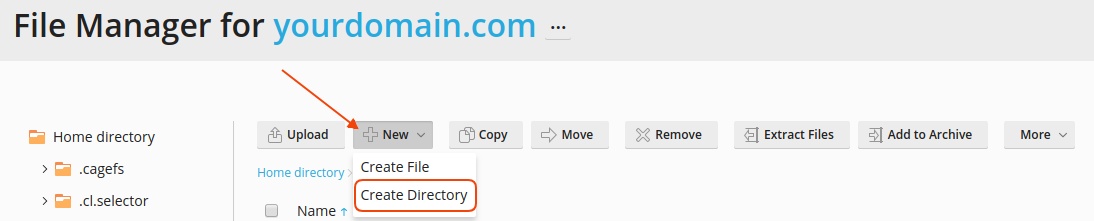
3.3 Select New >> Create Directory.
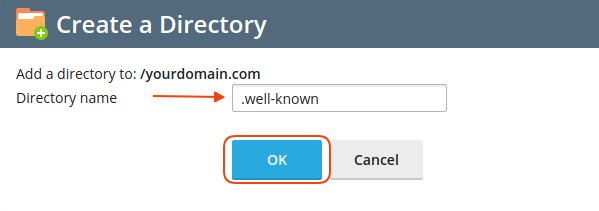
3.4 In the window that appears, create the folder named .well-known and click OK.
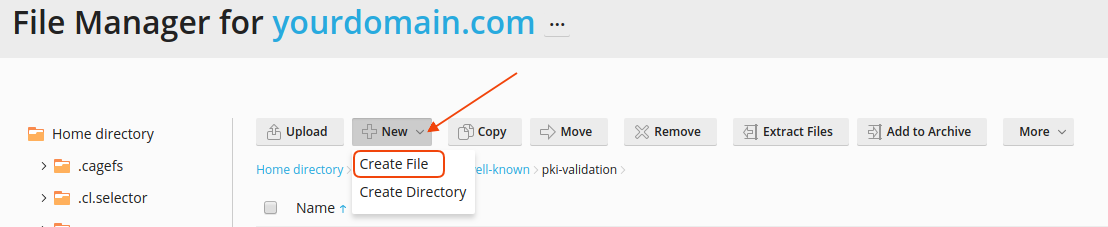
3.5 Open the .well-known folder you just created by double-clicking it and repeat the same process, this time creating a new folder named pki-validation.

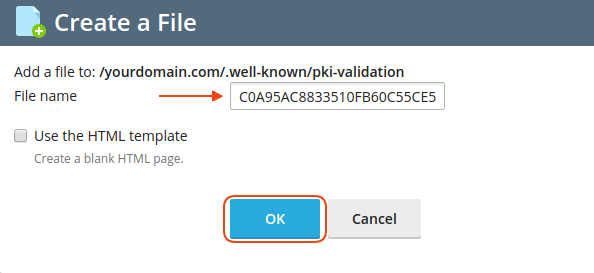
3.6 After opening the pki-validation folder, create a .txt file based on the instructions that have been sent. In our example, select New >> Create File.
3.7 Create a .txt with the name of your own file sent to you in the instructions. In our example the File name is C0A95AC8833510FB60C55CE58671604F.txt and select OK.
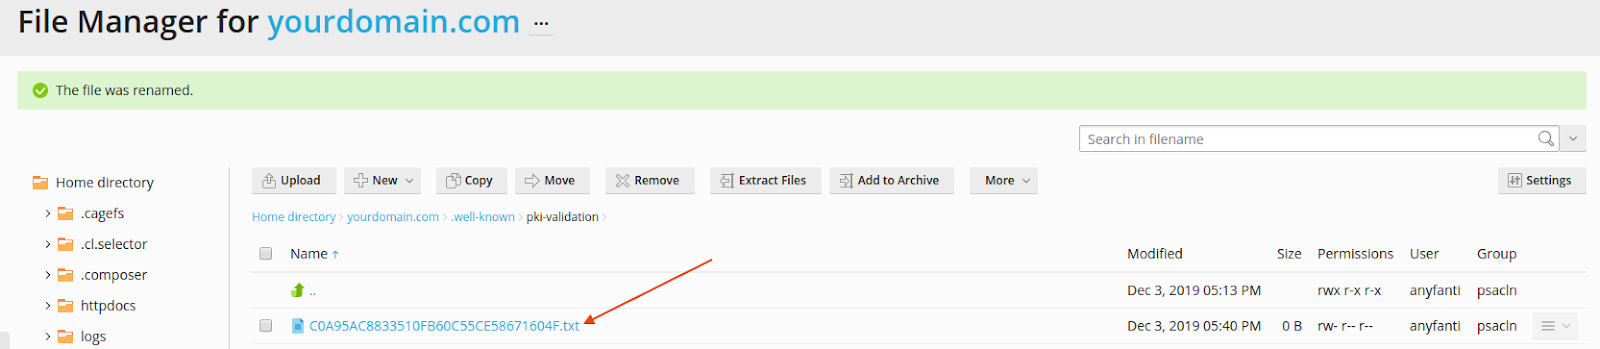
3.8 Then double-click on the .txt file you just created.
In the text editor that opens, copy the content of the file sent to you in the instructions (File Content) and select OK.
Note: In this step you have the alternative to upload the .txt file either via your Plesk or via File Manager to the specified path.3.9 Once you have created the above file, it will take some time for the domain to be certified by the issuing authority and for the new certificates to be issued. Once the certificates are issued, they will be sent to your SSL administrator's email and to install them, proceed to step 6 of the SSL installation steps.
You haven't found what you are looking for?
Contact our experts, they will be happy to help!
Contact us