
Customer Support
How can I create my own custom nameservers through myTophost Panel?
If you want to create your own custom nameservers for your domain (e.g., ns1.yourdomain.com and ns2.yourdomain.com), you can follow the steps below. Custom nameservers are useful if you want the domain’s name to be visible in the authoritative nameservers of other domains you manage.
Step 1: Add your private nameservers in Plesk
- Log in to your Plesk control panel.
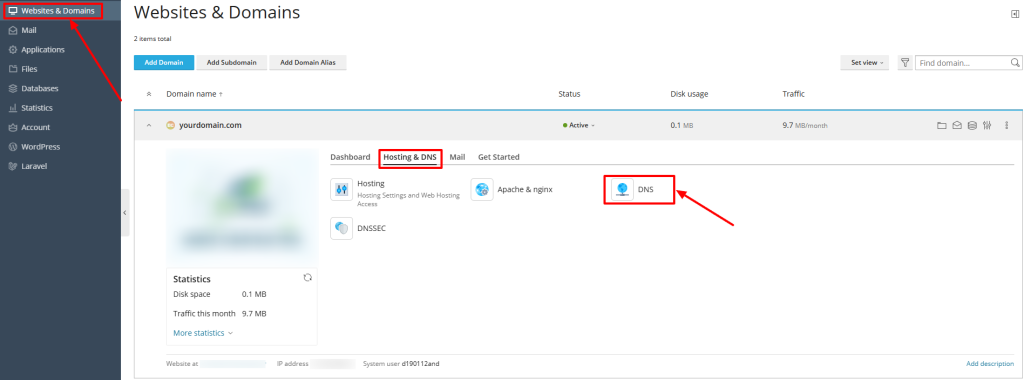
- Go to Websites & Domains > yourdomain.com > Hosting & DNS > DNS.
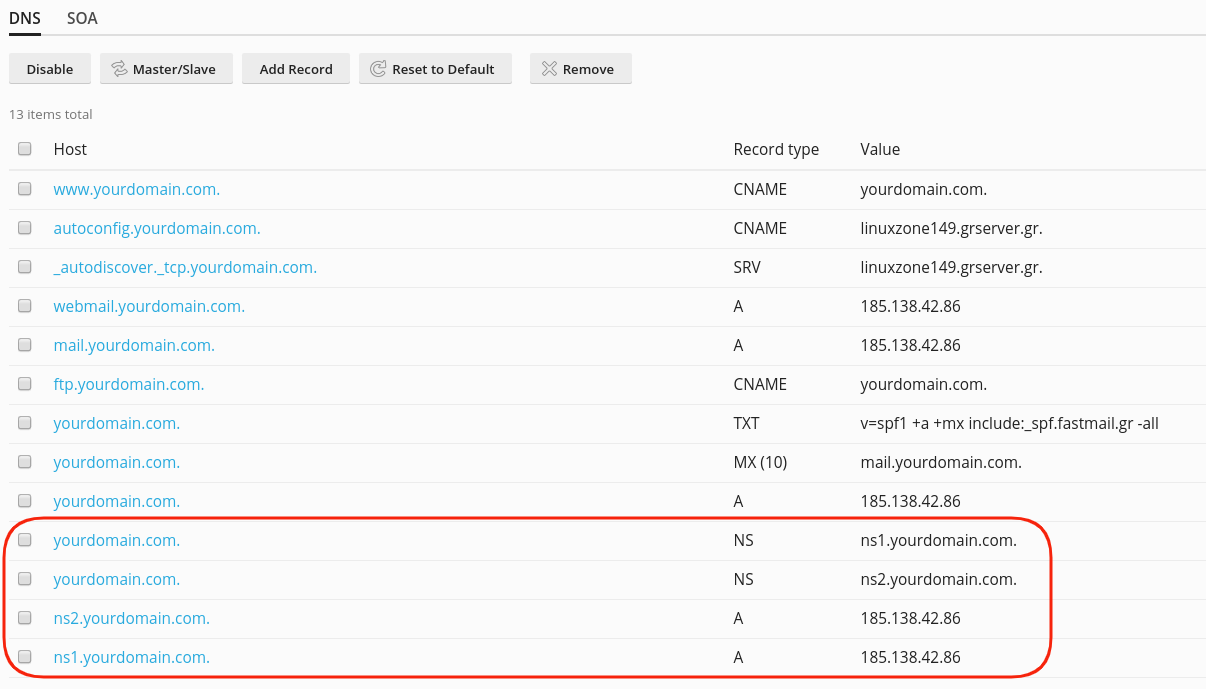
- Add the following DNS records:
- NS record:
yourdomain.com. NS ns1.yourdomain.com.yourdomain.com. NS ns2.yourdomain.com. - A record:
ns1.yourdomain.com. A [IP of first nameserver]ns2.yourdomain.com. A [IP of second nameserver]
- NS record:
These records inform DNS resolvers which IP addresses correspond to your custom nameservers.
Step 2: Register the nameservers with your domain registrar
You must register the custom nameservers (ns1 and ns2) in the domain registry. This may vary between registrars — in some cases, it occurs automatically when you save the nameserver values, while in others, it requires a separate action. Follow your registrar’s instructions.
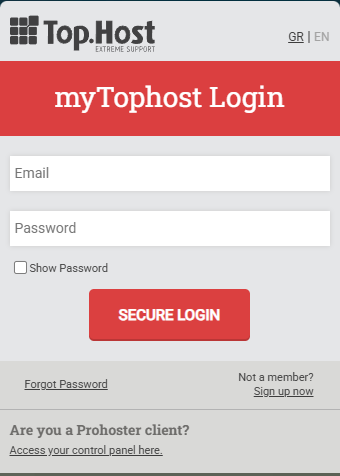
Step 3: Create Custom Nameservers in the myTophost Panel
If your domain is registered with Top.Host:
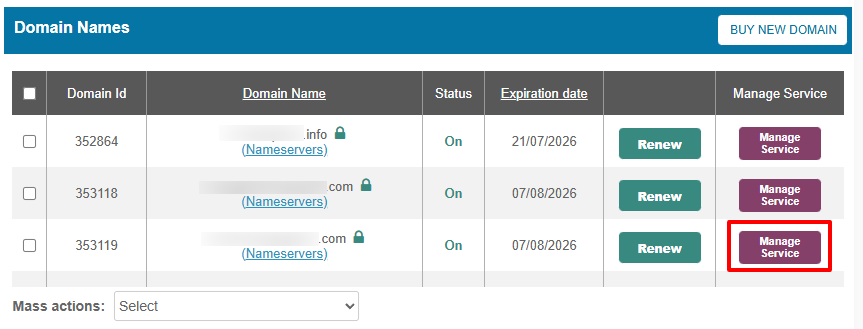
- Log in to your myTophost Panel using your administrator email and password.
- Locate your domain in the list and click Manage Service (or the equivalent option next to the domain name).
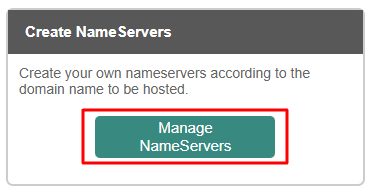
- Select Manage Nameservers.
- Enter your custom nameserver names (e.g., ns1.yourdomain.com and ns2.yourdomain.com) and their corresponding IP addresses.
- Save the changes.
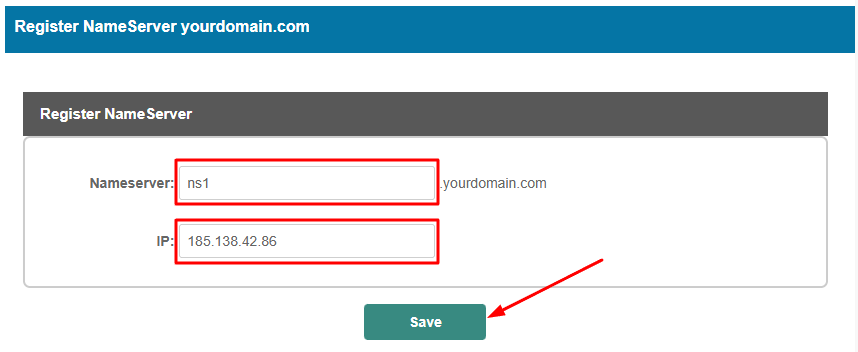
- Repeat the same process for the second nameserver.
Final Notes
- After completing all steps, your custom nameservers should be active and usable with other domains. Keep in mind that DNS propagation may take up to 48 hours.
- If you want to assign these custom nameservers to another domain (e.g., otherdomain.com), you will also need to update that domain’s NS records to point to your custom nameservers.
- Make sure that the IPs you assign are correct and point to the hosting infrastructure intended to respond to DNS requests.
You haven't found what you are looking for?
Contact our experts, they will be happy to help!
Contact us