
Customer Support
Standalone installation of Acronis Backup on a Windows VPS
This guide explains how to install Acronis Cyber Protect Agent on a Windows-based VPS using a standalone installation, without a hosting control panel.
The installation is performed through the CloudEvo Console and requires access credentials provided by the Support team.
Prerequisites
Before you begin, make sure that:
- You have Remote Desktop (RDP) access to your Windows VPS
- You have received CloudEvo Console login credentials from Support
- The VPS is running a Windows operating system
Step 1: Connect to the VPS via Remote Desktop
Connect to your Windows server using Remote Desktop Connection (RDP) and the VPS credentials.
If you are not familiar with Remote Desktop, you can refer to the relevant guide in the knowledge base or the official guide here.
Step 2: Log in to the CloudEvo Console
From a web browser on the VPS:
- Open the CloudEvo Console
- Log in using the credentials provided by the Support team
Step 3: Accept the Legal Terms
On your first login:
- Review and accept the Legal Terms in order to proceed
Step 4: Select the workload to protect
In the Select workloads to protect section:
- Choose Windows
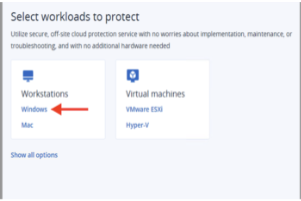
This selection ensures that the correct Acronis Agent is downloaded for your operating system.
Step 5: Download and start the Acronis Agent installer
After selecting the workload:
- The file CyberProtect_AgentForWindows_web is automatically downloaded
- The file is saved in the Downloads folder on the server
To begin installation:
- Navigate to the Downloads folder
- Double-click the file to launch the installer

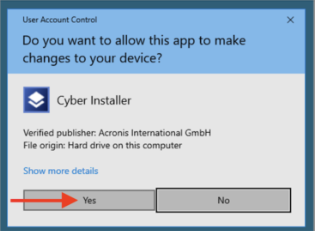
Step 6: Approve the installation
When prompted by Windows security:
- Click Yes to allow the installation to proceed
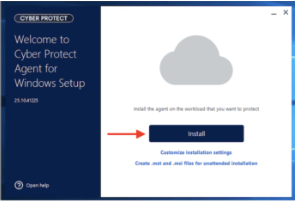
Step 7: Start the installation
In the installer window:
- Click Install to begin installing the Acronis Agent
The installation process takes a few minutes.
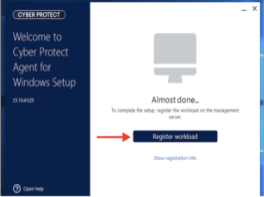
Step 8: Register the workload
Once the installation is complete:
- Click Register Workload
This step links the installed Agent with your Acronis endpoint in CloudEvo.
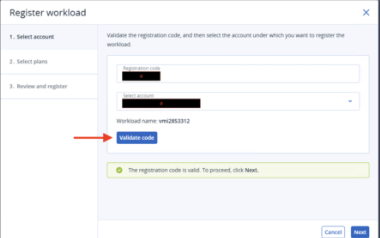
Step 9: Browser validation
A browser popup will appear:
- Click Validate
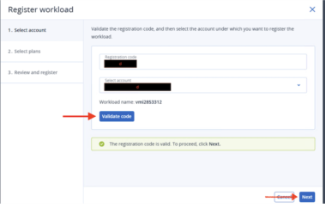
- Then click Next
Step 10: Complete the setup
Continue by clicking Next where prompted.
The Agent registration and activation process will complete automatically.
Step 11: Installation completed
The standalone installation of the Acronis Backup Agent on your Windows VPS is now complete.
Your VPS will appear in the CloudEvo Console and is ready for:
- Backup plan configuration
- Backup execution
- Protection status monitoring
You haven't found what you are looking for?
Contact our experts, they will be happy to help!
Contact us